How to install Windows 11 on VirtualBox VM
You can install Windows 11 on a VirtualBox virtual machine, and in this guide, you will learn how. VirtualBox is an open-source virtualization platform from Oracle that makes it easy to create virtual machines to run Windows 11, Windows 10, or another OS alongside the main installation on the same hardware.
If you want to install Windows 11 22H2 or 21H2 without workarounds, you must install VirtualBox 7 or higher, as starting with the release, the virtualization platform includes support for TPM 1.2 and 2.0 and Secure Boot to meet the hardware requirements. Otherwise, you will receive the “This PC can’t run Windows 11” message during the installation.
This guide will teach you the steps to create a virtual machine and install Windows 11 on VirtualBox.
Install Windows 11 on VirtualBox
If you plan to set up a Windows 11 virtual machine, you will need to install VirtualBox, download the latest ISO file of Windows 11, and then continue with the instructions below.
To install Windows 11 22H2 or 21H2 on a VirtualBox virtual machine, use these steps:
-
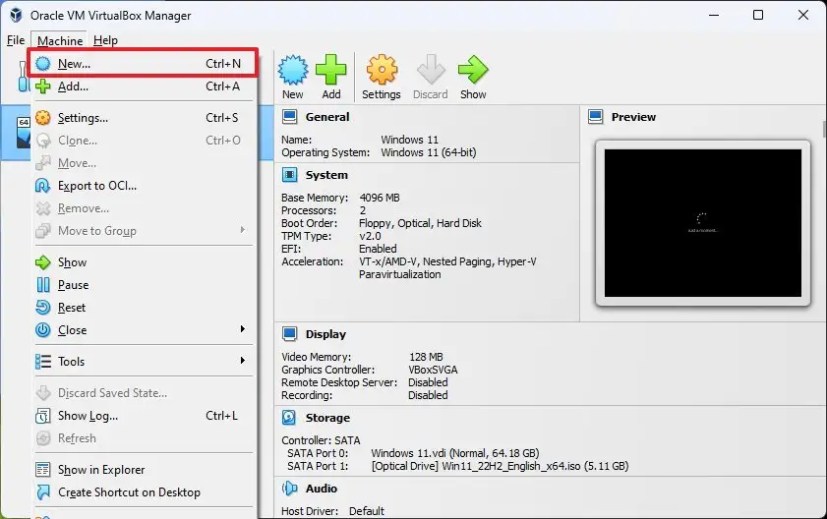
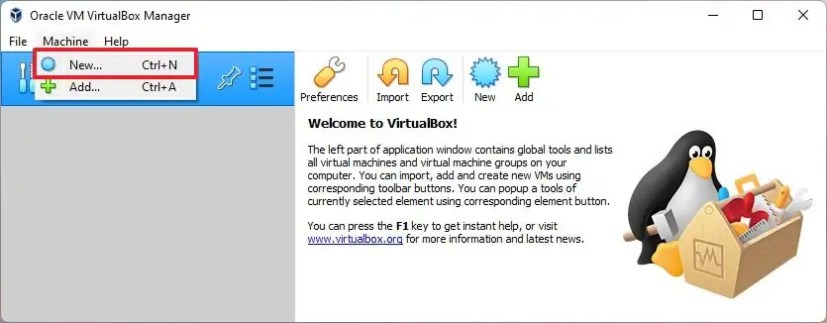
Open VirtualBox.
-
Click the Machine menu and select the New option.
-
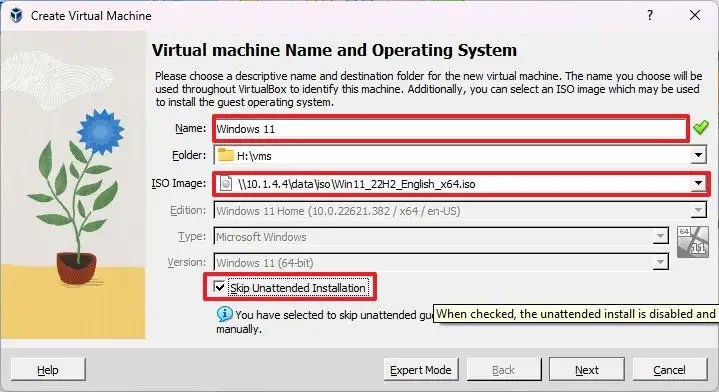
In the Name field, confirm a descriptive name for the virtual machine – for example, Windows 11.
-
(Optional) In the “Folder” setting, specify the location to store the virtual machine.
-
In the “ISO Image” setting, specify the path and Windows 11 ISO file name.
-
Check the “Skip Unattended Installation” option.
-
Click the Next button.
-
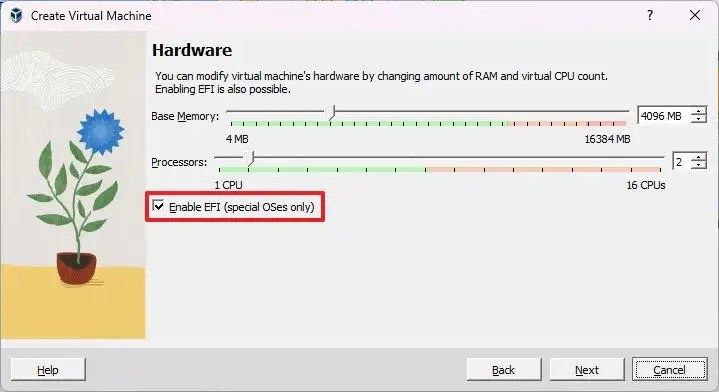
Select 4GB or more system memory to allocate for the machine.
-
Select two or more processors, depending on your hardware configuration.
-
Check the Enable EFI option.
-
Check the “Create a Virtual Hard Disk Now” option.
-
Select 64GB or more to install Windows 11 on the virtual machine.
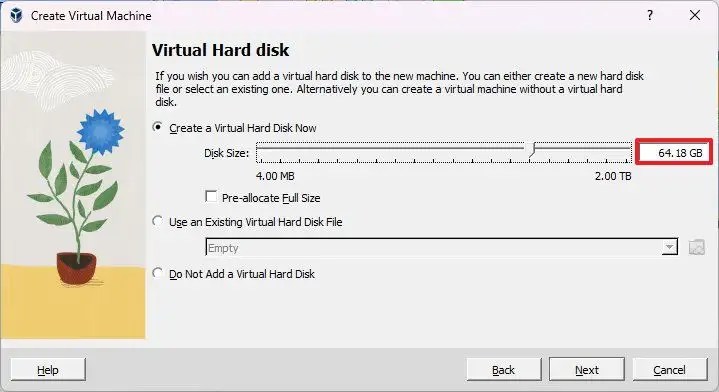
-
Click the Next button.
-
Click the Finish button.
-
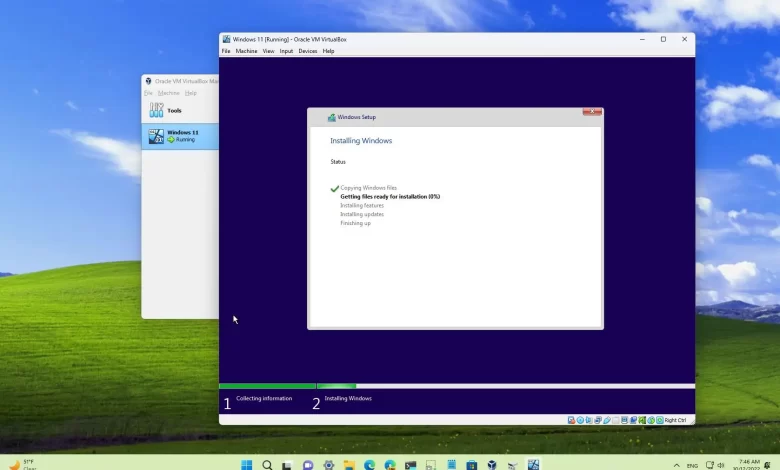
Right-click the virtual machine, select the Start submenu and choose the Normal Start option.
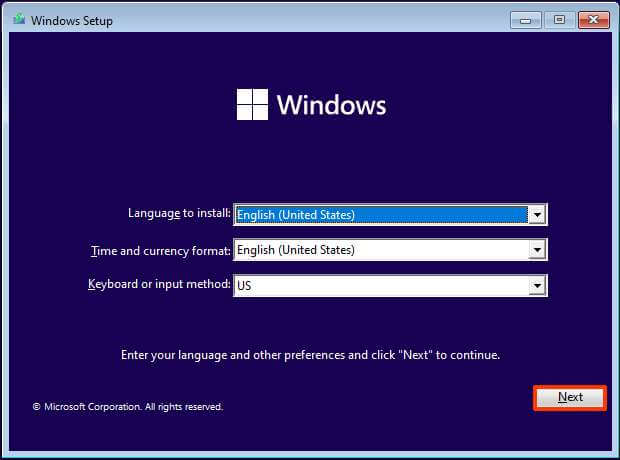
-
On the Windows Setup page, click the Next button.
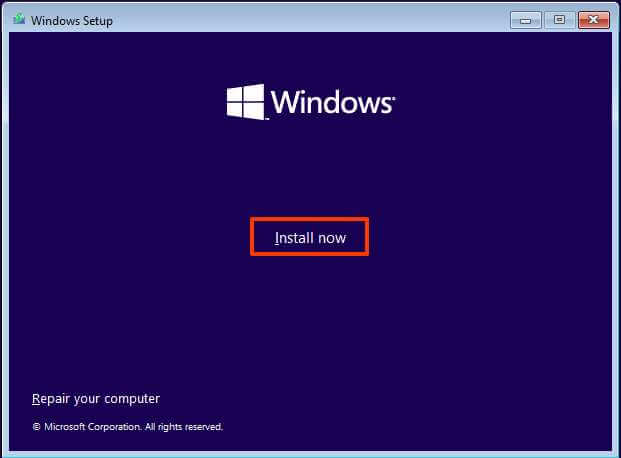
-
Click the Install now button.
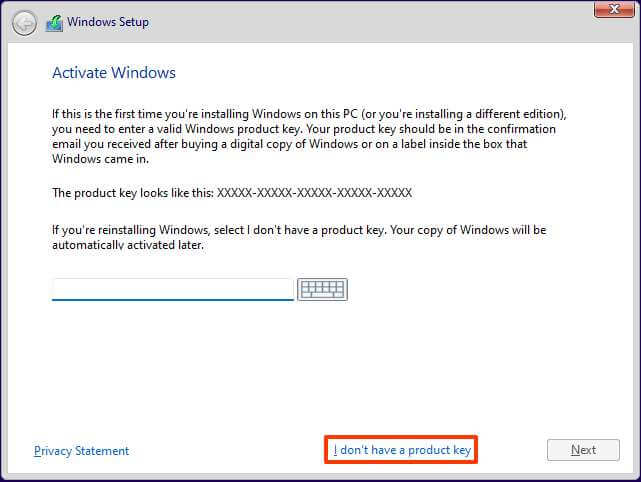
-
(Optional) Click the “I don’t have a product key” option. (You can always activate it after the installation.)
-
Select the edition of “Windows 11” your license key activates (if applicable).
-
Check the “I accept the license terms” option.
-
Click the Next button.
-
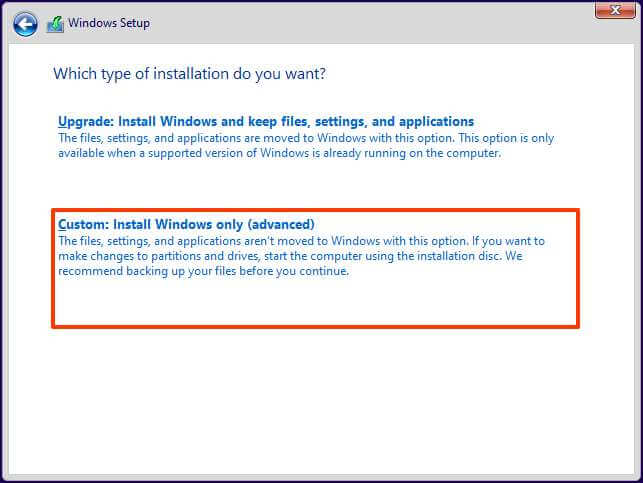
Select the “Custom: Install Windows only (advanced)” option.
-
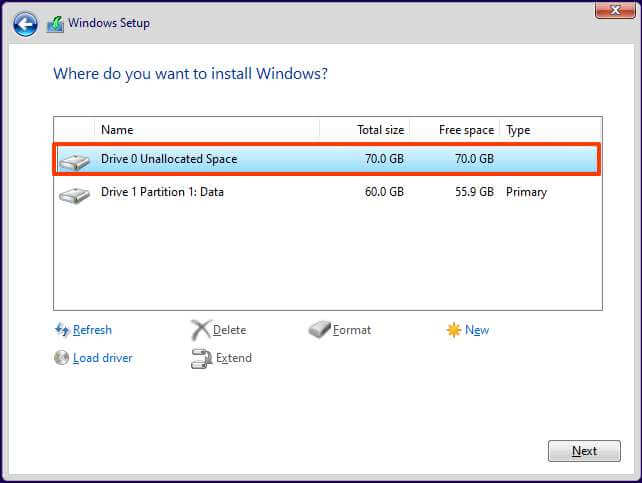
Select the hard drive (Drive 0 Unallocated Space) to install Windows 11 22H2 or 21H2 on a VirtualBox virtual machine.
-
Click the Next button.
-
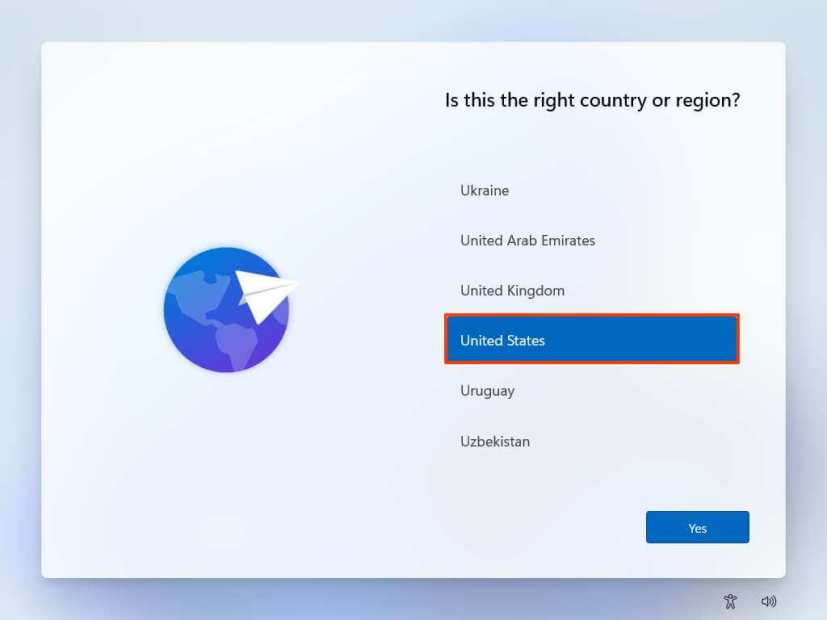
Select your region setting after the installation on the first page of the out-of-the-box experience (OOBE).
-
Click the Yes button.
-
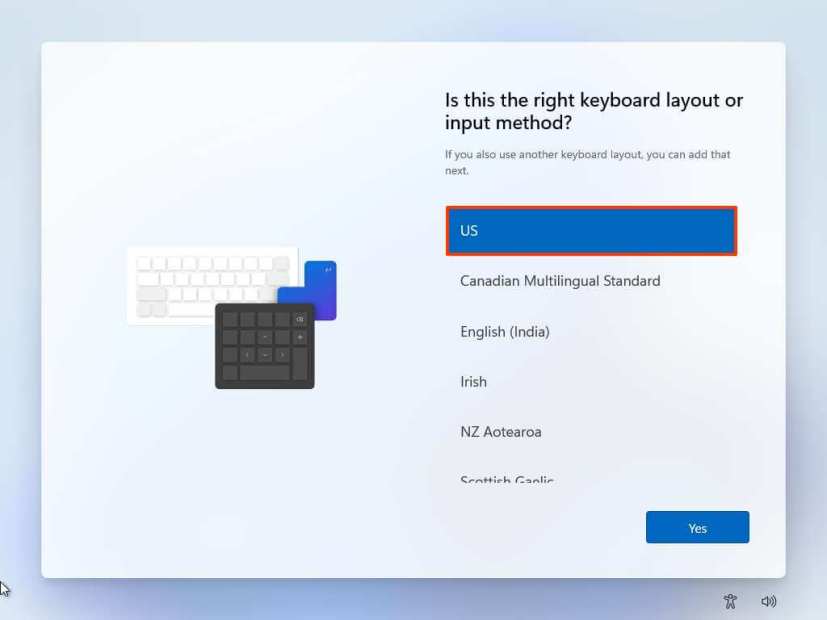
Select your keyboard layout setting.
-
Click the Yes button.
-
Click the Skip button if you don’t require configuring a second layout.
-
The computer will automatically connect to the network if it uses an Ethernet connection. If you have a wireless connection, you must set up the connection manually (a security key may be required).
-
(Optional) Confirm a name for the computer.
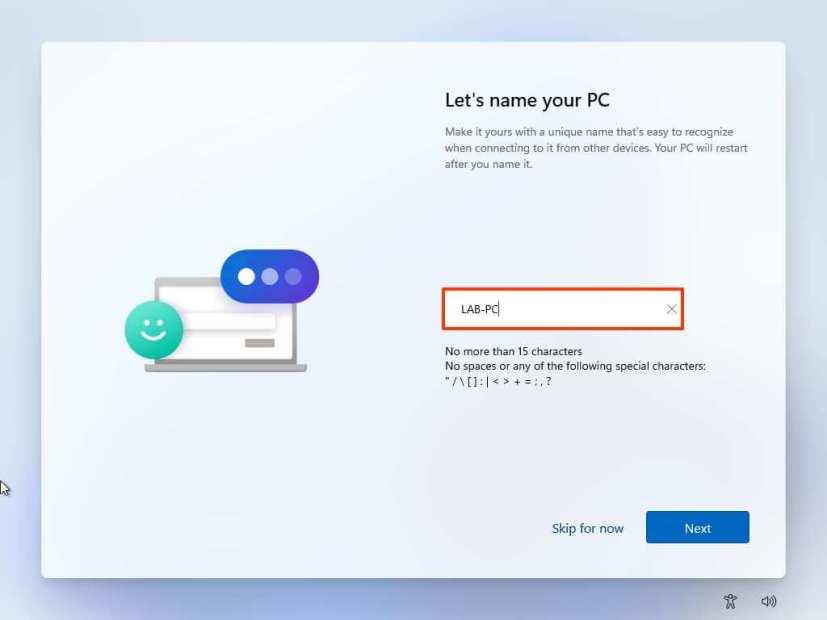
-
Click the Next button. (The device will restart automatically.)
-
Select the “Set up for personal use” option if you are setting up a copy of Windows 11 Pro. The “Home” edition does not have this option.
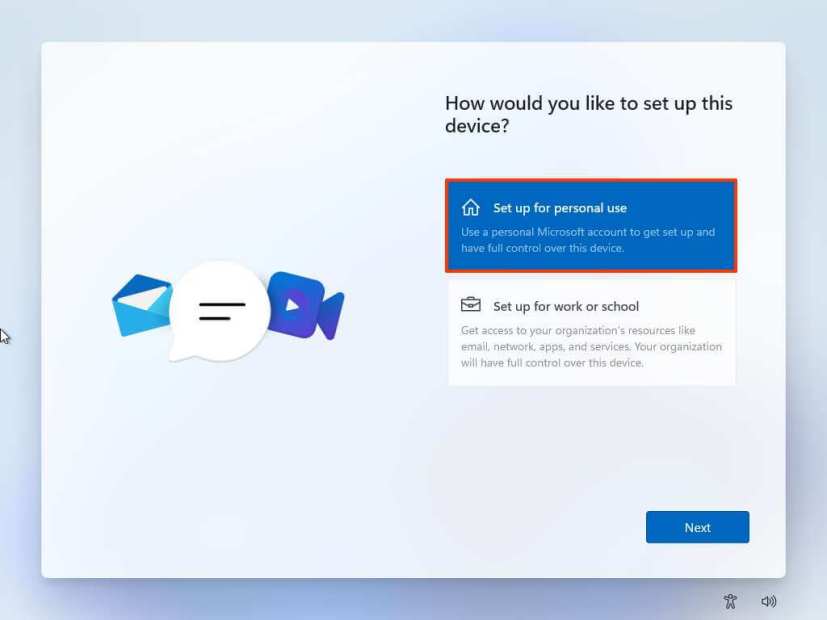
-
Click the Next button.
-
Click the Sign in button.
-
Confirm your Microsoft account email, phone number, or Skype identification to create an account.

-
Click the Next button.
-
Confirm your Microsoft account password.
-
Click the Next button.
-
Click the “View more options” setting.
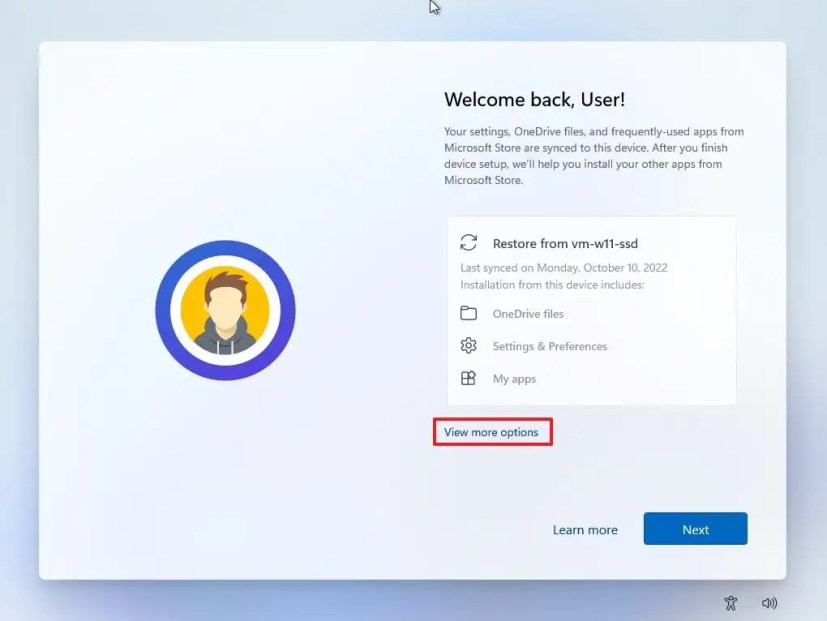
-
Select the “Set up as new device” option.
-
Click the Next button.
-
Click the Create PIN button.
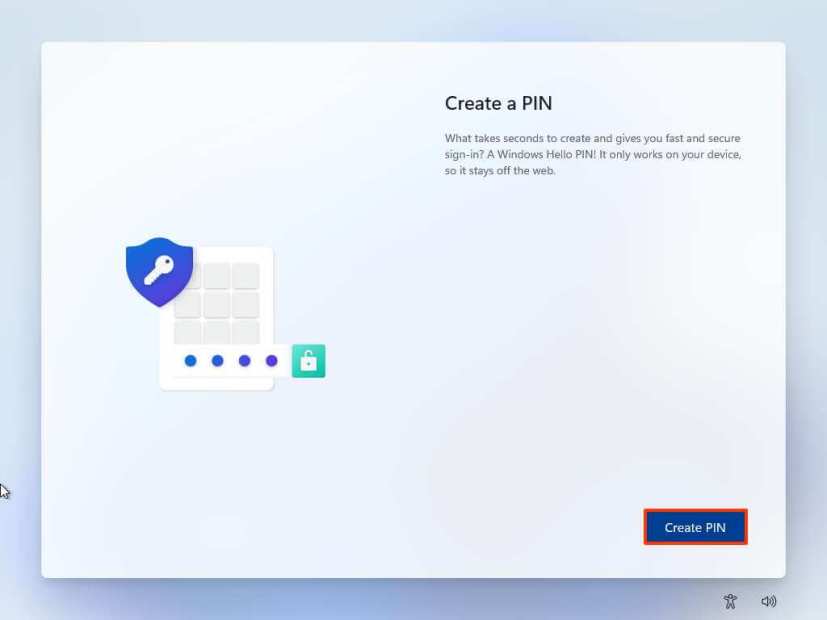
-
Create a new four-digit PIN.
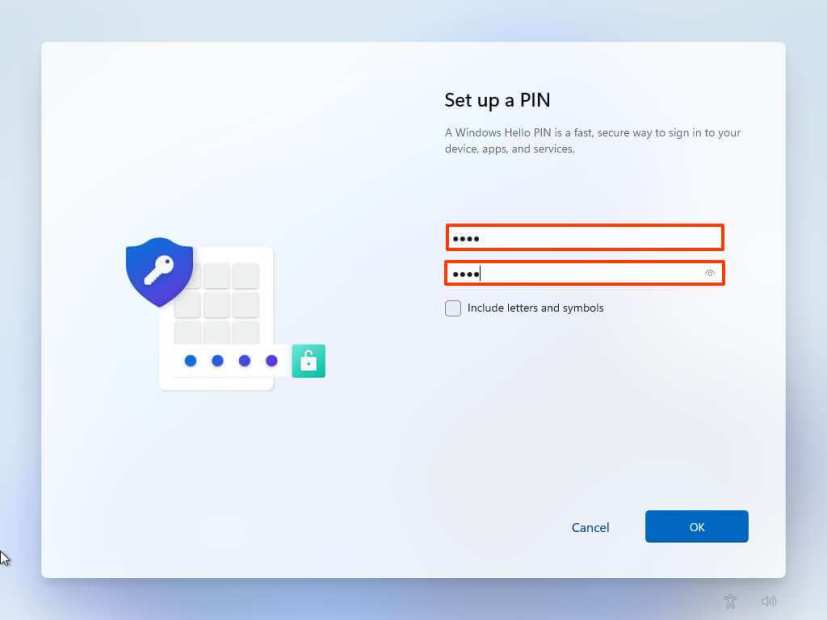
-
Click the OK button.
-
Confirm the privacy settings best suit your situation by turning on or off the toggle switch for each setting.
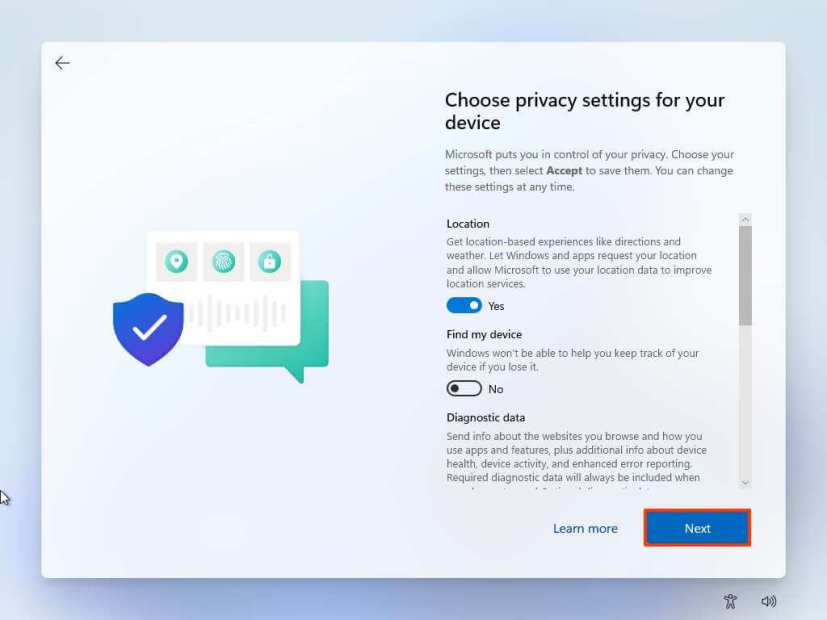
-
Click the Next button.
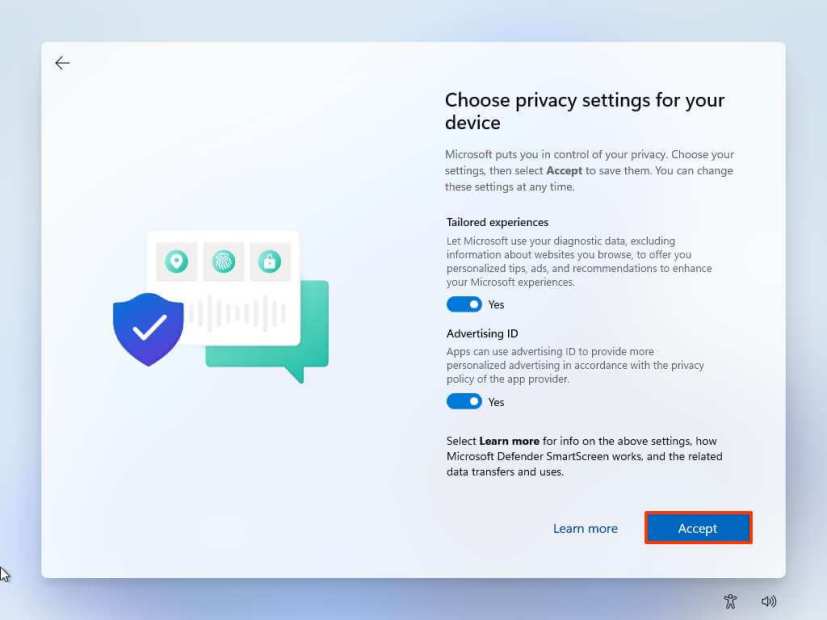
-
Click the Next button again.
-
Click the Accept button.
-
(Optional) On the “Customize your device” page, select one or more ways you plan to use the device to allow the setup to suggest tools and services customization during this experience.
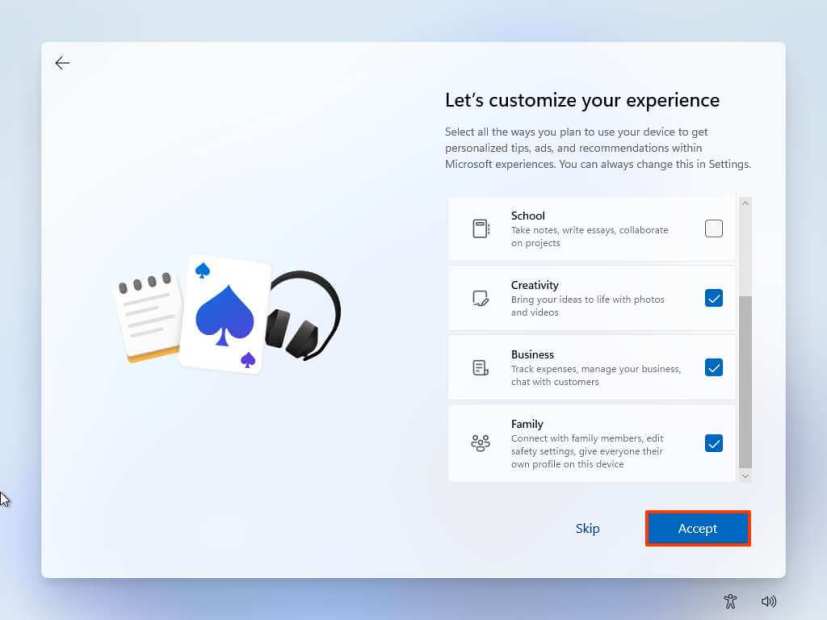
-
Click the Accept button to continue. Or click the Skip button to skip this part of the setup.
-
Select the “Next” button to automatically upload your Desktop, Pictures, and Documents folders to the cloud. Or Select the “Only save file to this PC” option.
-
Click the Next button.
-
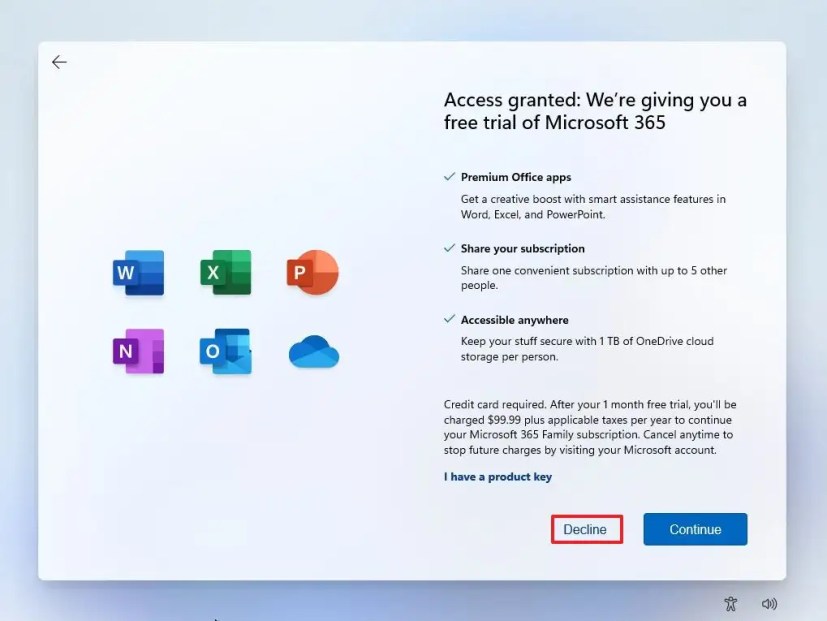
Click the “Decline” button to skip the Microsoft 365 setup.
-
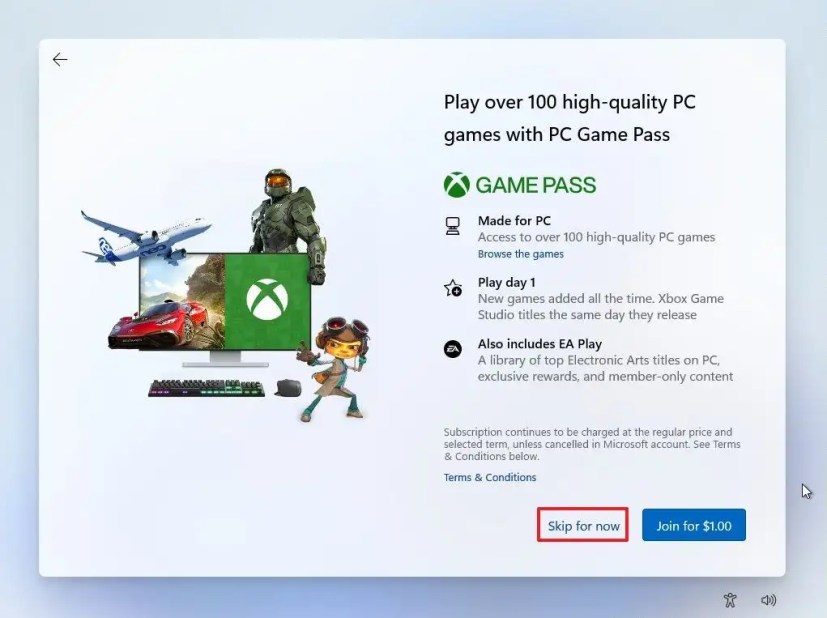
Click the “Skip for now” option to skip the Game Pass promotion.
-
After the installation, on the Windows 11 desktop, click the Devices menu and select the “Insert Guest Additions CD image” option.
Quick note: The Guest Additions is the package that contains all the VirtualBox drivers to allow the operating system to work correctly in the virtual environment.
-
Open File Explorer in the virtual machine (Windows key + E keyboard shortcut).
-
Click on This PC from the left side.
-
Under the “Devices and drives” section, double-click to open the VirtualBox Guest Additions disc.
-
Double-click the VBoxWindowsAdditions.exe file to launch the installer.
-
Click the Next button.
-
Click the Next button again.
-
Click the Install button.
-
Select the Reboot now option.
-
Click the Finish button.
After you complete the steps, the virtual machine will restart, and you can start using Windows 11.
Install Windows 11 on VirtualBox (workaround)
You don’t need to use these instructions if you have VirtualBox version 7 or higher. Instead, use the above instructions.
To create a virtual machine to host Windows 11 bypassing TPM and Secure Boot, use these steps:
-
Open VirtualBox.
-
Click the Machine menu and select the New option.
-
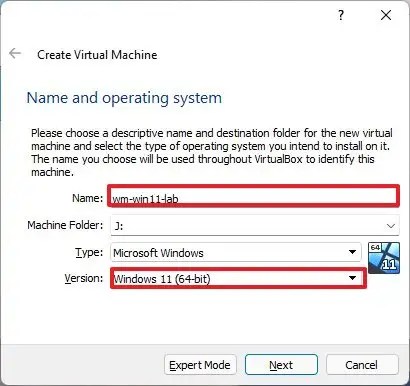
In the Name field option, confirm a descriptive name for the virtual machine. For example, vm-win11-lab.
-
(Optional) In the Machine Folder option, select the folder location to create the Windows 11 VM.
-
In the “Type” option, select the Microsoft Windows platform option.
-
In the Version option, select the Windows 11 (64-bit) option.
-
Click the Next button.
-
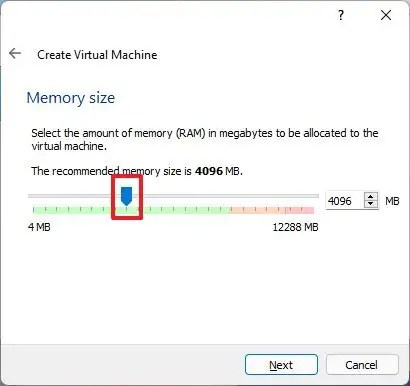
Select 4GB or more system memory to allocate for the machine.
-
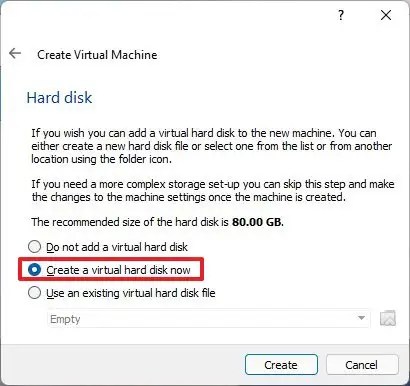
Select the Create a virtual hard disk now option.
-
Click the Create button.
-
Select the VDI (VirtualBox Disk Image) option.
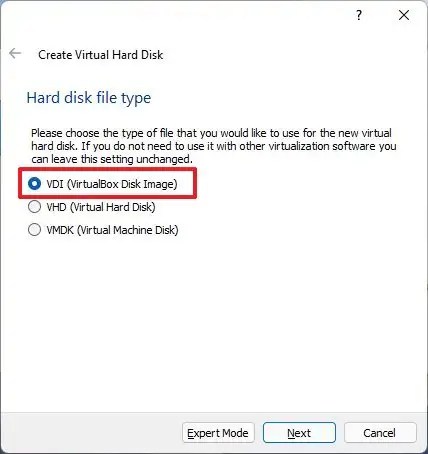
Quick note: The application supports multiple hard drive file types, including VDI, VHD (Virtual Hard Disk), and VMDK (Virtual Machine Disk). While every option has its advantages and disadvantages, the VDI option is optimal for most use cases for general purposes.
-
Click the Next button.
-
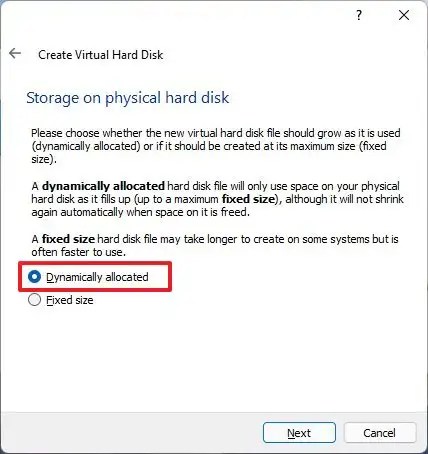
Select the Dynamically allocated option to grow the size of the drive as needed.
-
Click the Next button.
-
Specify the size of the virtual hard drive.
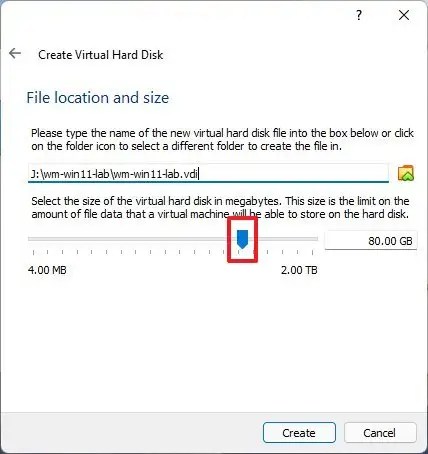
Quick note: The default 80GB is suitable for installation and light applications, but the size will depend on the applications and files you want to store in the drive.
-
Click the Create button.
-
Right-click the newly created virtual machine from the left side and select the Settings option.

-
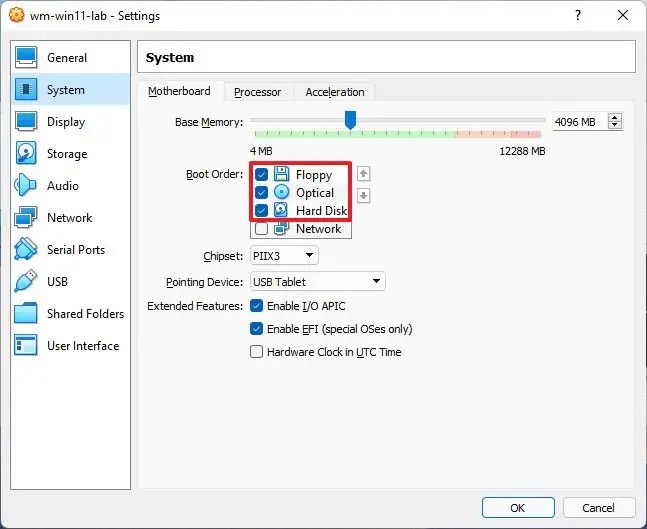
Click on System.
-
Click the Motherboard tab.
-
(Optional) In the Boot order option, configure the boot order by selecting the item and using up and down arrows on the left. Or clear the item check box to disconnect peripherals.
-
Click the Processor tab.
-
In the Processors option, use the slider to select how many processors to allocate for the Windows 11 virtual machine.

Quick note: The selection will depend on your hardware capability, but usually, you want to give at least two to four cores per Windows 11 machine.
-
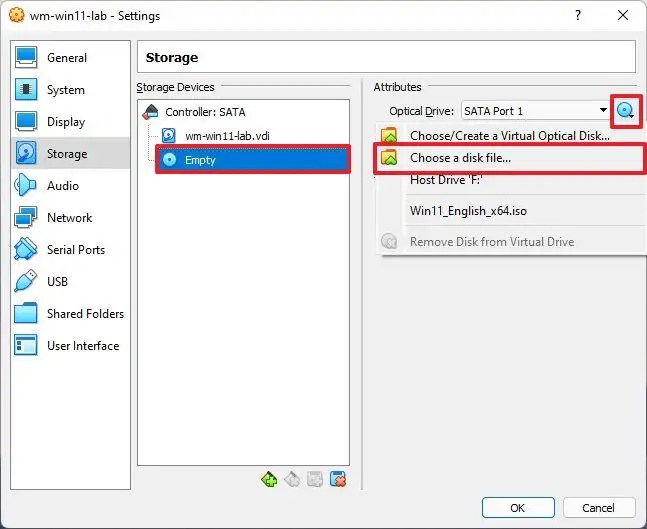
Click on Storage.
-
Under the “Storage Devices” section, select the Optical Drive (disc icon) option.
-
Under the “Attributes” section, click the disc icon menu, and select the Choose a disk file option.
-
Select the Windows 11 ISO file.
-
Click the Open button to mount the installation media.
-
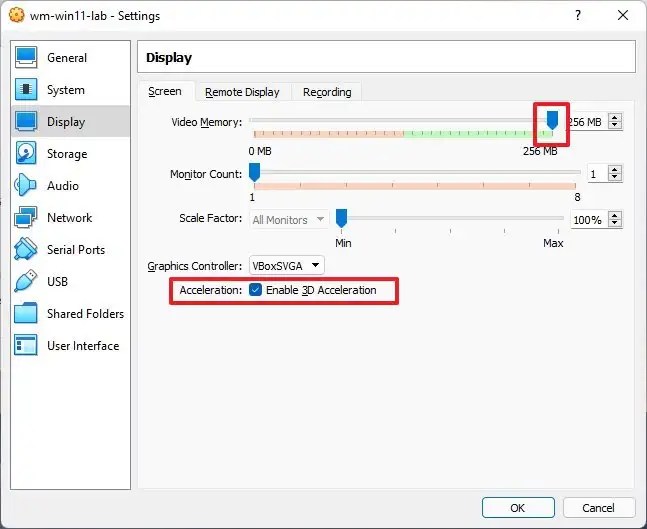
(Optional) Click on Display.
-
Click the Screen tab.
-
(Optional) In the Acceleration option, check the Enable 3D Acceleration option to improve video performance.
-
In the Video Memory option, use the slider and specify the virtual machine’s amount of video memory. (The more, the better.)
-
Click the OK button.
-
Right-click the virtual machine, select the Start submenu and choose the Normal Start option.
-
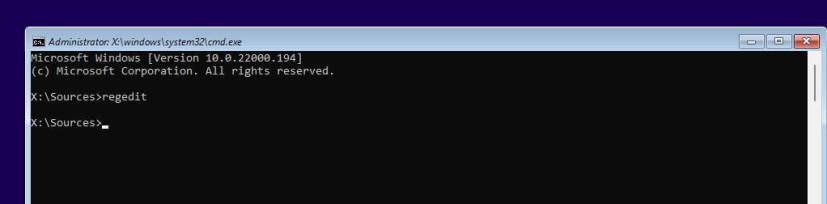
On the “Windows Setup” page, use the Shift + F10 keyboard shortcut to open Command Prompt.
-
Type the following command and press Enter:
regedit
-
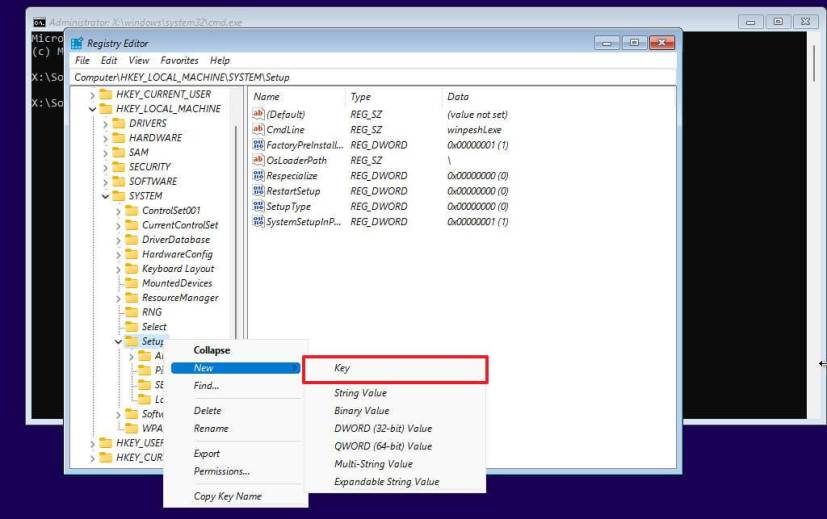
Navigate the following path:
HKEY_LOCAL_MACHINE\SYSTEM\Setup
-
Right-click the Setup (folder) key, select New, and then Key option.
-
Name the key LabConfig and press Enter.
-
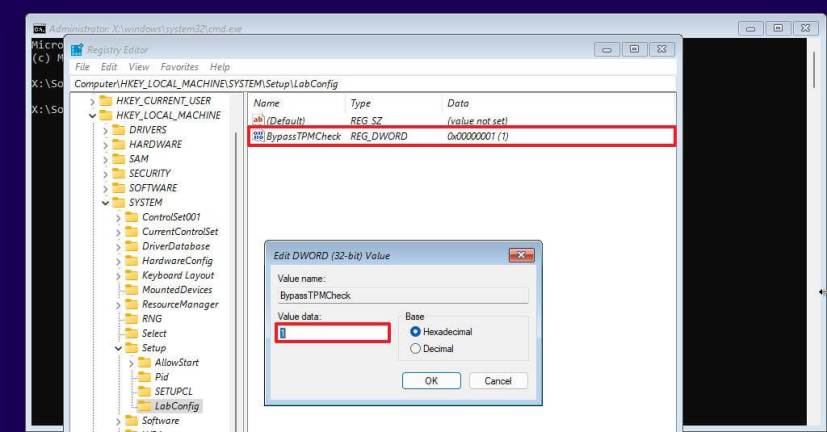
Right-click the LabConfig (folder) key, select New, and then the DWORD (32-bit) Value option.
-
Name the key BypassTPMCheck and press Enter.
-
Double-click the newly created key and set its value from 0 to 1.
-
Click the OK button.
-
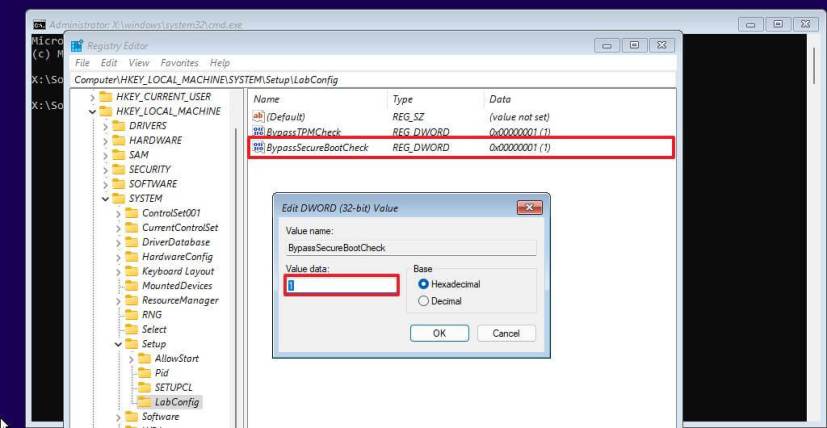
Right-click the LabConfig (folder) key, select New, and then the DWORD (32-bit) Value option.
-
Name the DWORD BypassSecureBootCheck and press Enter.
-
Double-click the newly created key and set its value from 0 to 1.
-
Click the OK button.
-
Click the Next button.
-
Click the Install now button.
-
Click the I don’t have a product key option if you are reinstalling. If Windows 11 has been previously activated after the installation, reactivation will happen automatically.
-
Select the edition of “Windows 11” that your license key activates (if applicable).
-
Check the I accept the license terms option.
-
Click the Next button.
-
Select the Custom: Install Windows only (advanced) option.
-
Select the hard drive (Drive 0 Unallocated Space) to install Windows 11 on a VirtualBox virtual machine.
-
Click the Next button.
-
Select your region setting after the installation on the first page of the out-of-the-box experience (OOBE).
-
Click the Yes button.
-
Select your keyboard layout setting.
-
Click the Yes button.
-
Click the Skip button if you don’t require configuring a second layout.
-
The computer will automatically connect to the network if it uses an Ethernet connection. If you have a wireless connection, you must set up the connection manually (a security key may be required).
-
(Optional) Confirm a name for the computer.
-
Click the Next button. (The device will restart automatically.)
-
Select the “Set up for personal use” option if you are setting up a copy of Windows 11 Pro. The “Home” edition does not have this option.
-
Click the Next button.
-
Click the Sign in button.
-
Confirm your Microsoft account email, phone number, or Skype identification to create an account.
-
Click the Next button.
-
Confirm your Microsoft account password.
-
Click the Next button.
-
Click the “View more options” setting.
-
Select the “Set up as new device” option.
-
Click the Next button.
-
Click the Create PIN button.
-
Create a new four-digit PIN.
-
Click the OK button.
-
Confirm the privacy settings best suit your situation by turning on or off the toggle switch for each setting.
-
Click the Next button.
-
Click the Next button again.
-
Click the Accept button.
-
(Optional) On the “Customize your device” page, select one or more ways you plan to use the device to allow the setup to suggest tools and services customization during this experience.
-
Click the Accept button to continue. Or click the Skip button to skip this part of the setup.
-
Select the “Next” button to automatically upload your Desktop, Pictures, and Documents folders to the cloud. Or Select the “Only save file to this PC” option.
-
Click the Next button.
-
Click the “Decline” button to skip the Microsoft 365 setup.
-
Click the “Skip for now” option to skip the Game Pass promotion.
-
After the installation, on the Windows 11 desktop, click the Devices menu and select the “Insert Guest Additions CD image” option.
Quick note: The Guest Additions is the package that contains all the VirtualBox drivers to allow the operating system to work correctly in the virtual environment.
-
Open File Explorer in the virtual machine (Windows key + E keyboard shortcut).
-
Click on This PC from the left side.
-
Under the “Devices and drives” section, double-click to open the VirtualBox Guest Additions disc.
-
Double-click the VBoxWindowsAdditions.exe file to launch the installer.
-
Click the Next button.
-
Click the Next button again.
-
Click the Install button.
-
Select the Reboot now option.
-
Click the Finish button.
Once you complete the steps, the virtual machine will restart, and you can start using Windows 11 in a virtual environment.
Alternatively, Oracle is building a new version of VirtualBox that will include seamless support to install Windows 11. Although it’s unclear when the new version will release with Secure Boot and TPM 2.0 support, you can already download a development preview to run Windows 11 without workarounds. However, since this is still a work in process, it may not work as expected.
We may earn commission for purchases using our links to help keep offering the free content. Privacy policy info.
All content on this site is provided with no warranties, express or implied. Use any information at your own risk. Always backup of your device and files before making any changes. Privacy policy info.